After Microsoft acquired iTap, all the clients changed their names, so this guide will work if your client was released before this event.
Today we are talking about setting up an RDP connection to a remote desktop using the paid client iTap mobile RDP. It can be download in App Store. It allows you to connect to Windows Server 2008 R2/2012 from devices running iOS.
Setting up the connection
Note 1. The "Use System Proxy" and "Gateway" parameters should only be used if this was specified in the instructions from the Tucha technical support specialists.
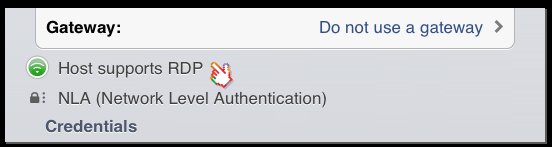
Note 2. If the domain name and port are entered correctly, the sign at the end of the "Host" section will be green and the user will see the message: "Host supports RDP".

Note 1. If you do not want to save your account data on this device, you should leave the "Ask for credentials when connecting" value in the "Credentials" section unchanged. In this case, the user name and password will be requested during each new connection.
Note 2. List of "Other Accounts On This Server". It contains the data of all the accounts that were used during connections to a particular server.
Note 3. List of "Other Known Accounts". The credentials from all the connections that are created in the RDP client are displayed here. This feature is very useful when several virtual machines have accounts with the same username and password (then, when adding a new server, you do not need to enter this data again, just select them from the "Other Known Accounts" list).
Note 4. We note that this RDP client allows you to set password protection to restrict access to your connections by unauthorized persons. To set a password, go to the iTap mobile RDP home screen and click "Set Lock Code" in the "Global Settings" section.

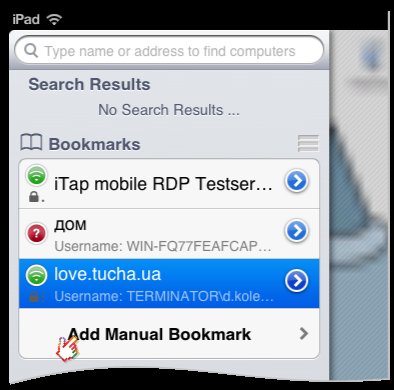
1. Launch the RDP client on your iPad.
2. In the main application window, click on the "Add Manual Bookmark" button.
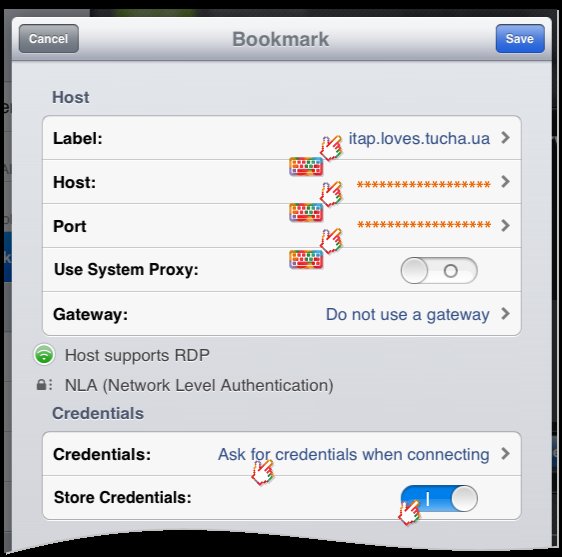
3. In the "Bookmark" window that opens, enter the access details for the virtual machine in the "Host" section. You can also configure additional connection parameters here, which are described at the end of the note.
- In the "Label" field, enter the name of the new connection that will be displayed in the main application window.
- In the "Host" field, enter the domain name of the remote machine you are going to connect.
- In the "Port" field, select "Custom", and then enter the remote machine port number.
4. Next, go to the "Credentials" section.
- The "Store Credentials" switch activates automatic saving of the user name and password.
- Item "Credentials". Click on it to enter the account details on the virtual machine. In the "Credentials" window, enter the username in the "Account" field, and the password for the account on the remote machine in the "Password" field. Then click the "Save" button.
5. After entering all the data, click "Save" to save the connection.
6. To connect to the virtual machine, just click on the connection name in the main window of the application.
Additional connection parameters
Let us briefly review the additional features for setting up an RDP connection in iTap mobile RDP, which are located in the "Settings" section.
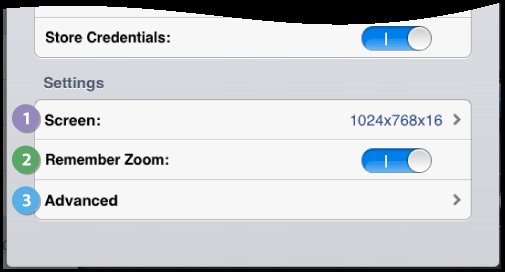
Note. For a slow Internet connection, it is recommended to set the minimal graphics parameters.
- The "Screen" tab. Here you can set the color depth and screen resolution settings.
- The "Remember Zoom" option. The RDP client remembers the scale of the remote desktop during the last session. Accordingly, during the next connection, this scale will be set by default.
- The "Advanced" tab. In this tab, there are many parameters that the user can configure, but we will focus on the most important ones:
- "Console": Connects to a remote server console.
- "Sound": audio playback on an iPad or virtual machine.
- "Performance": enables and disables visual effects: desktop background, font smoothing, Windows theme displaying, etc.
- Enable 3G Mode: the mode for working in 3G networks. Also, the user can separately adjust the color depth and resolution, and visual effects for this mode.