How to set up a site-to-site VPN in the cloud
- Home
- Blog
- Instructions
- How to set up a site-to-site VPN in the cloud
We help our clients to make their business convenient, and information storage and exchange secure. Therefore, we quickly respond to requests that users of our virtual servers make to our support service, and prepare clear instructions for solving important tasks.
Previously, we wrote about how to set up a client-to-site VPN, and in this post, we will tell you how to set up a site-to-site VPN in the cloud.
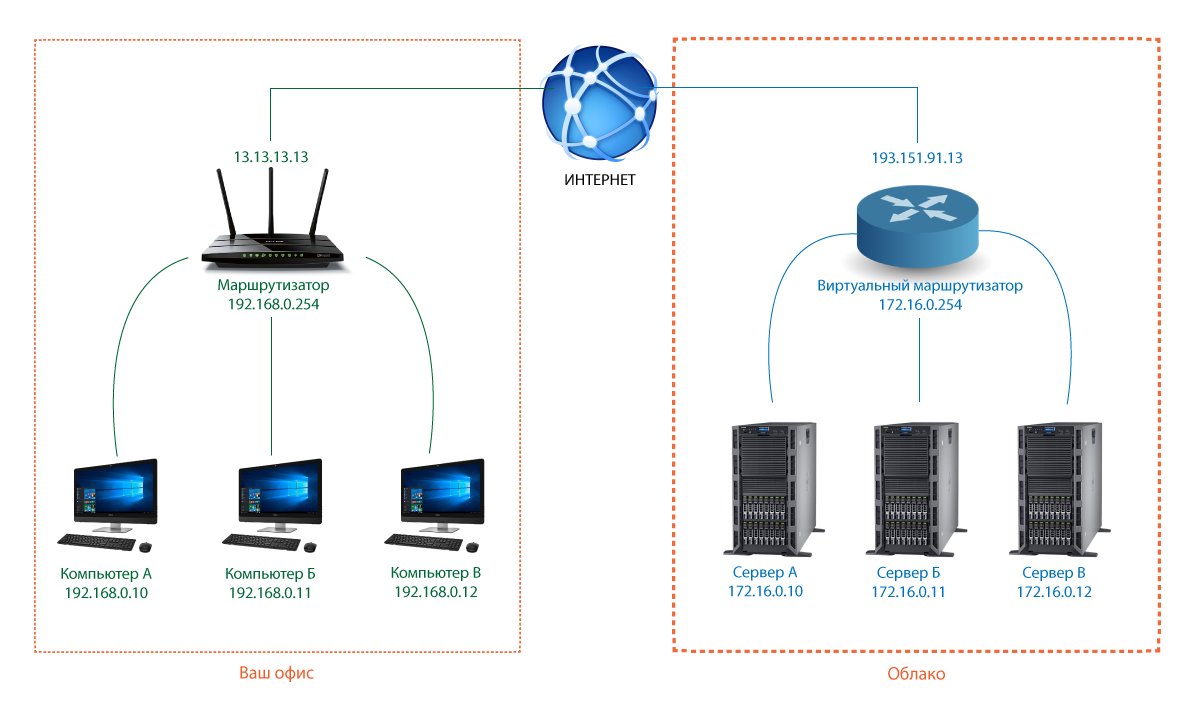
Site-to-site VPN is a type of connection in which two routers are combined into one local network. The connection goes through an encrypted tunnel, provides secure storage of information, and eliminates a number of problems that may occur when connecting to a remote desktop.
The router provides a VPN connection. It also serves as a gateway for a local network that computers are connected to. Therefore, nothing changes in the operation of your computers. You continue to work in the same mode.
Site-to-site VPN connection scheme:
It's simple. Carefully read each step, follow the instruction, and you everything will go well.
To create a tunnel, an IPsec connection type is used, which must be supported by a router.
Step 1. In the server administration panel, go to the Network tab, choose Select view — VPC, and then click the Add VPC button.

Step 2. Fill in the required fields in the window that has appeared and wait for 1-3 minutes. The system will process the request and create VPC.
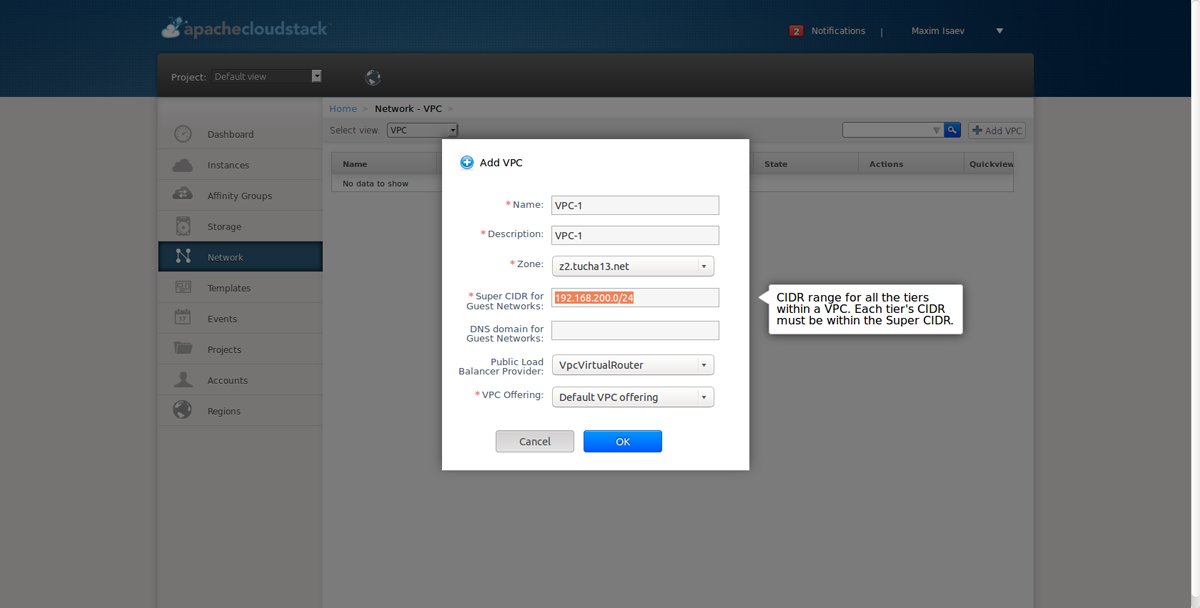
Note that CIDR for the intended network must be different from the local network CIDR or any other local network within the Apache CloudStack account.
CIDR is limited to addresses intended for building a private network. In other words, use addresses from the rfc1918-network, namely:
- 10.0.0.0 — 10.255.255.255 (10/8 prefix)
- 172.16.0.0 — 172.31.255.255 (172.16/12 prefix)
- 192.168.0.0 — 192.168.255.255 (192.168/16 prefix)
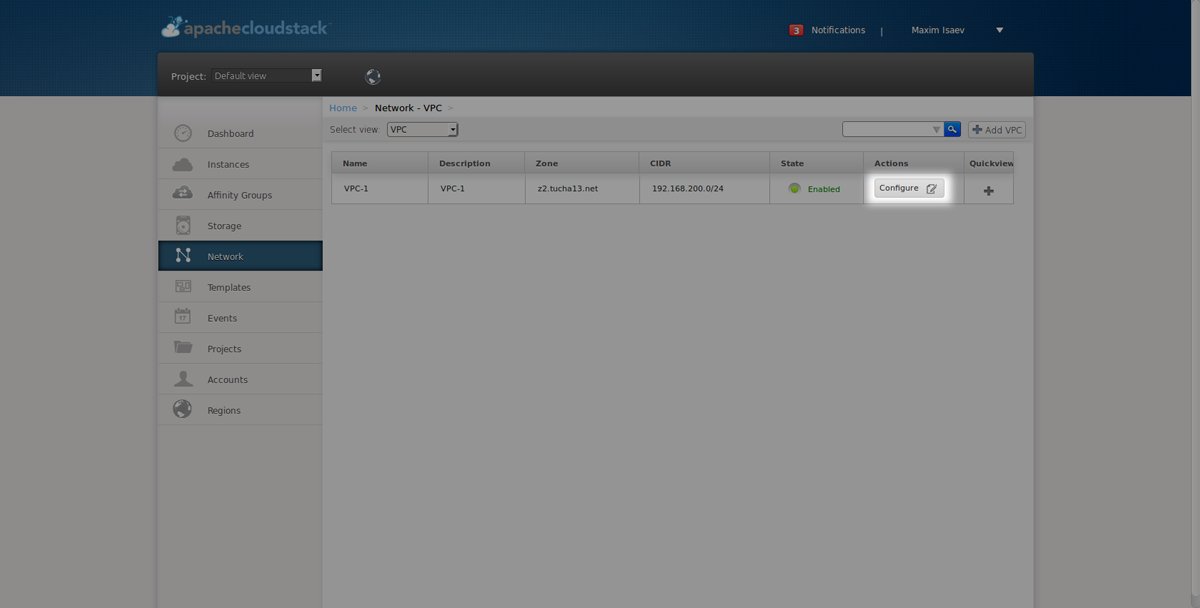
Step 3. After all operations are completed, you will see VPC in the panel. Click Configure here.
Step 4. Fill in the fields:
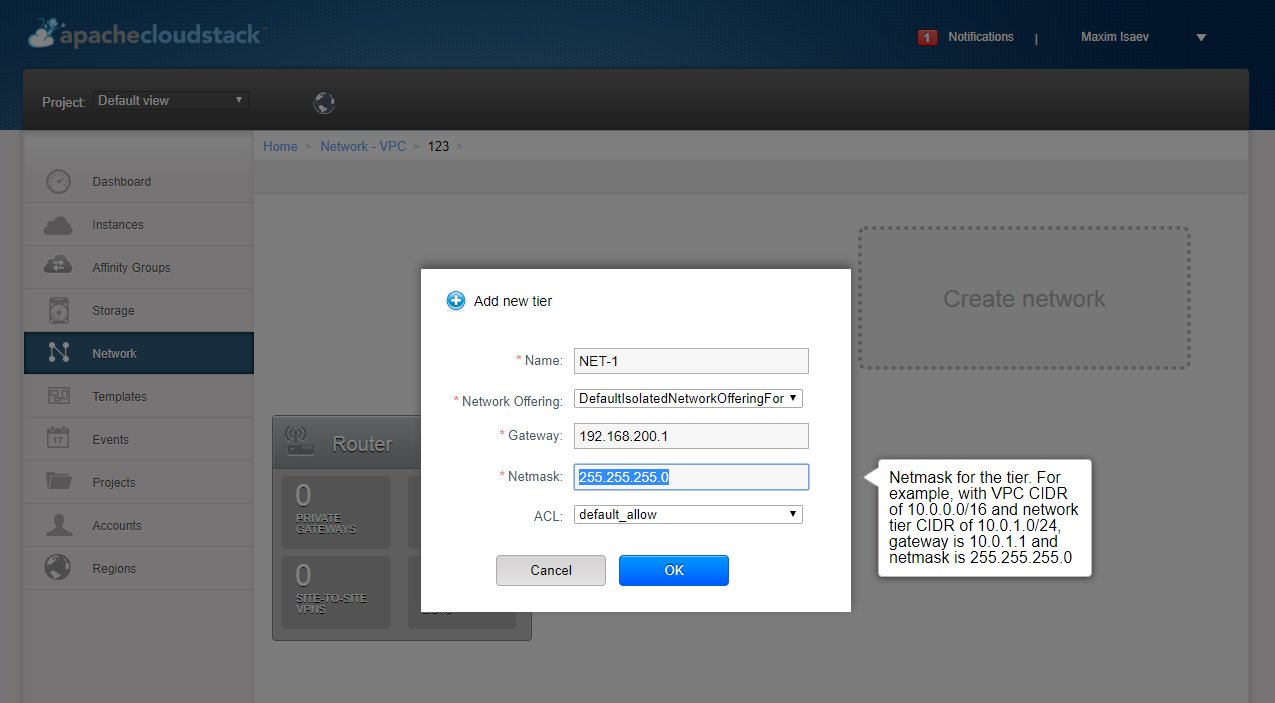
Note that Gateway and Netmask must be part of CIDR specified in Step 2.
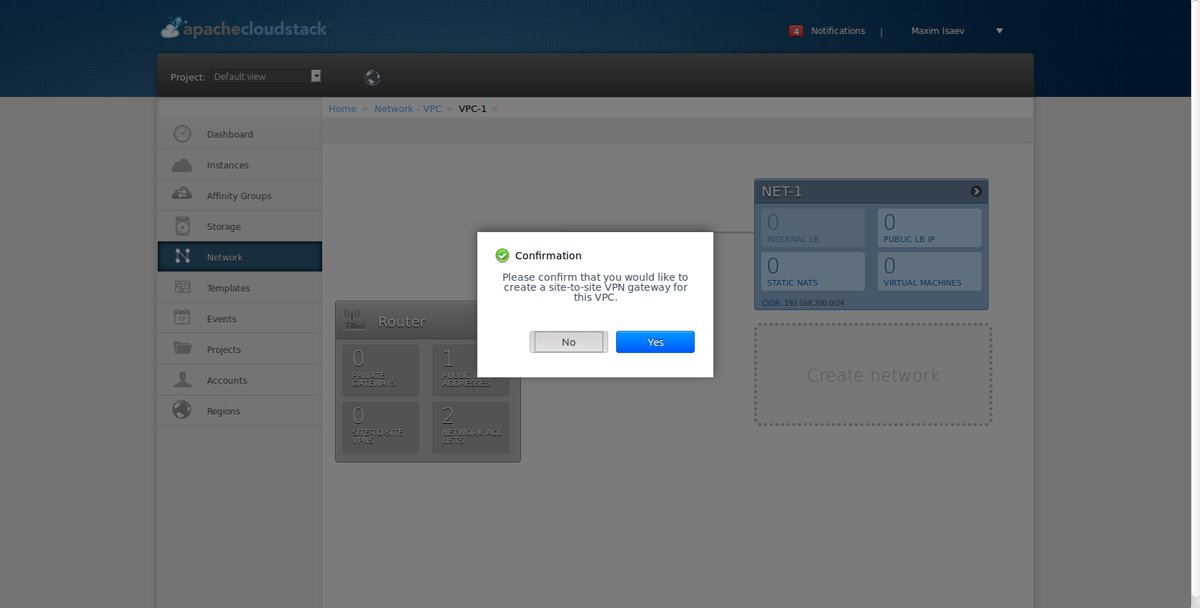
Step 5. in the Router block, select Site-to-site VPNs, and click Yes. This confirms your desire to create this type of VPN:
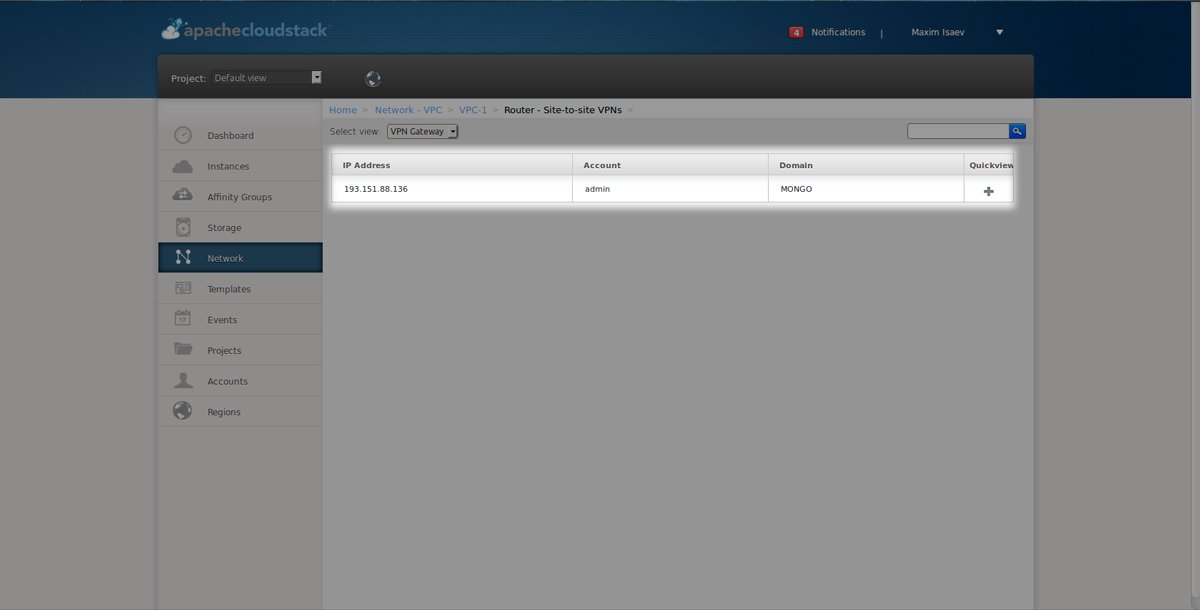
Step 6. After successful creation of Site-to-site VPNs, you will see the following window:
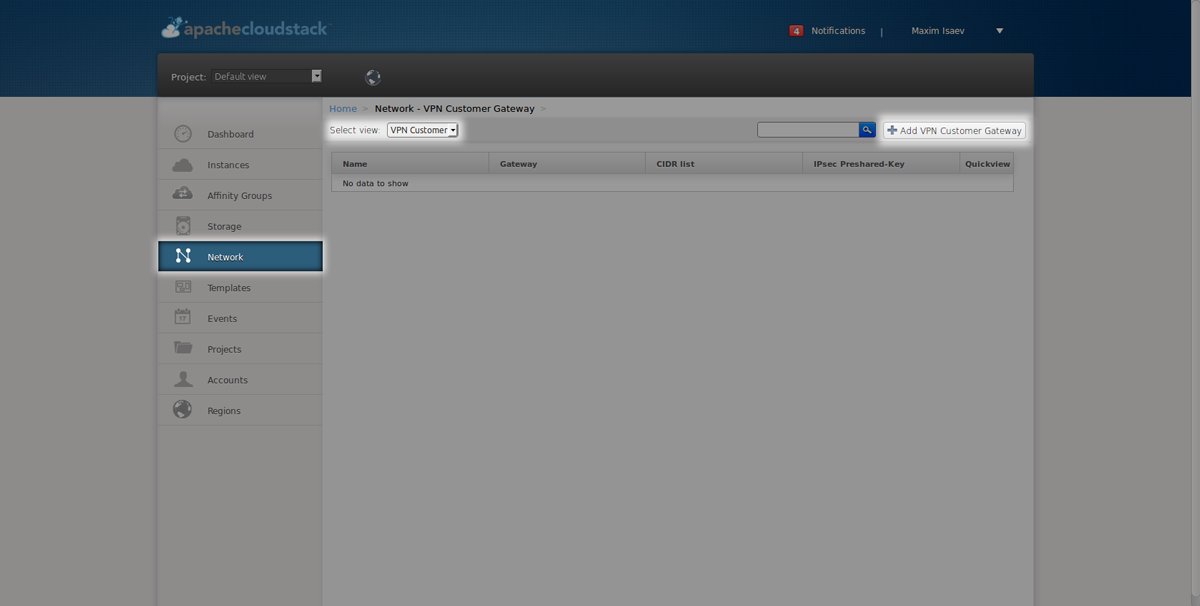
Step 7. Go back to the Network tab, choose Select view — VPN Customer Gateway, and click Add VPN Customer Gateway:
Step 8. Fill in all the required fields:

Please note that CIDR must be part of the local network of the remote office, and the Gateway must be an external address that is assigned by your provider.
Important: the settings for all parameters must be matched with the router to which the tunnel is being built. The screenshot shows only an example.
IKE and ESP encryption must be matched, as well as the keys. Also, the ESP lifetime must be multiple of 3600 (one hour).
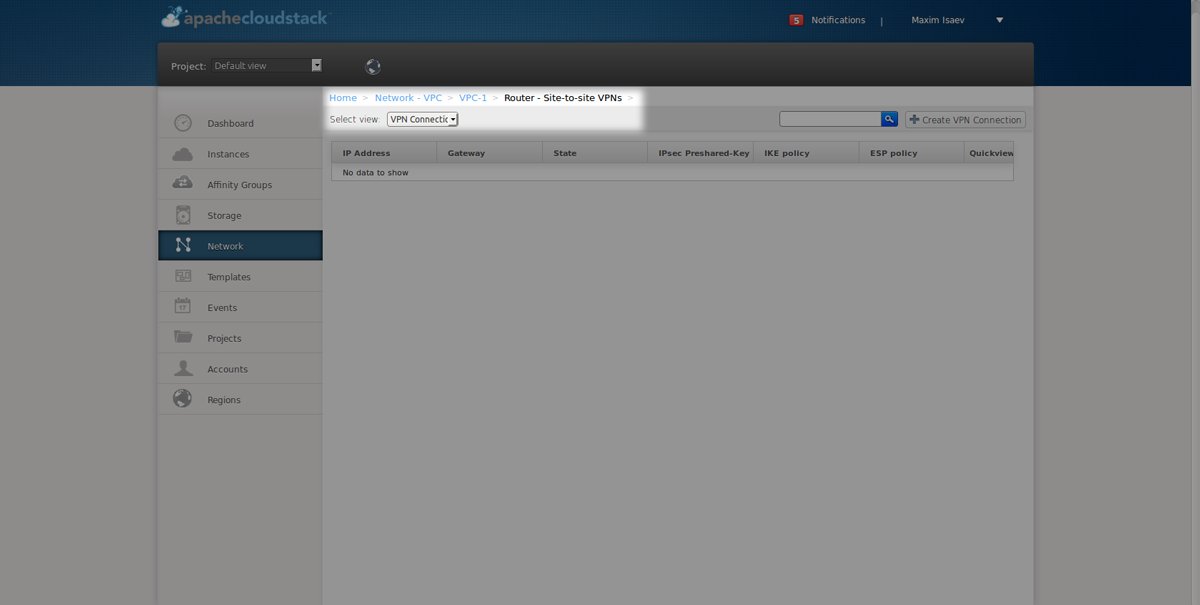
Step 9. After completion of the procedure that we have described above, go back to the Network tab, Select view — VPC.
Select our newly created VPC-1, click Configure, and select Site-to-site.
Here replace Select view with VPN Connection:
Step 10. Click Add VPN Connection and select the previously created VPN Customer Gateway:
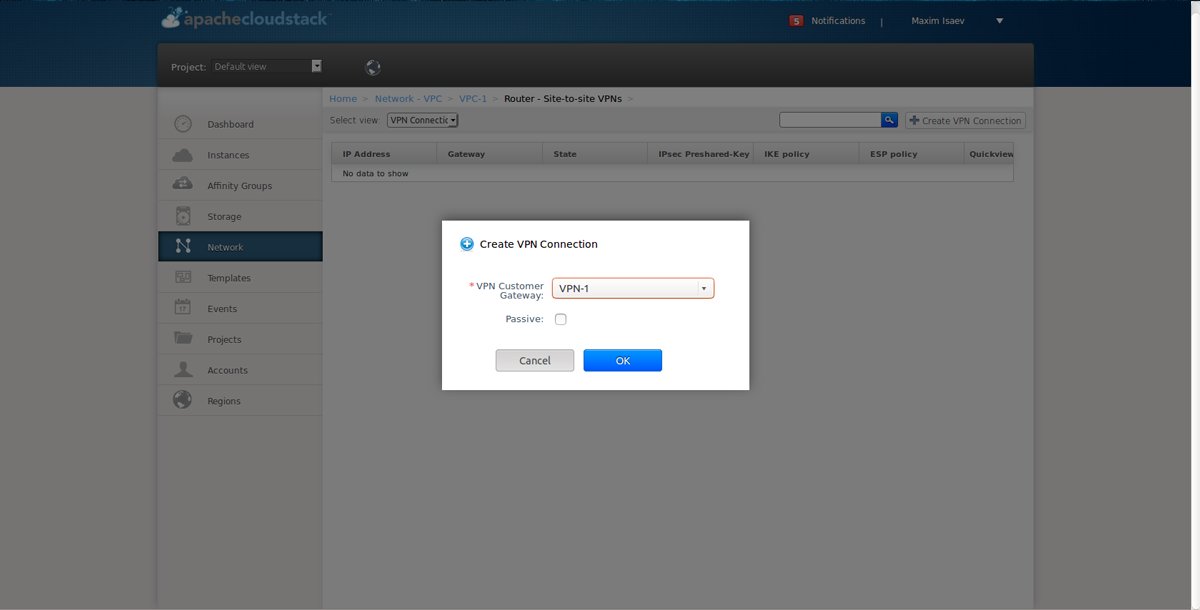
Step 11. Wait 1-3 minutes for the operation completion.
Everything is ready. After successful creation of Site-to-site, you will see the following window:
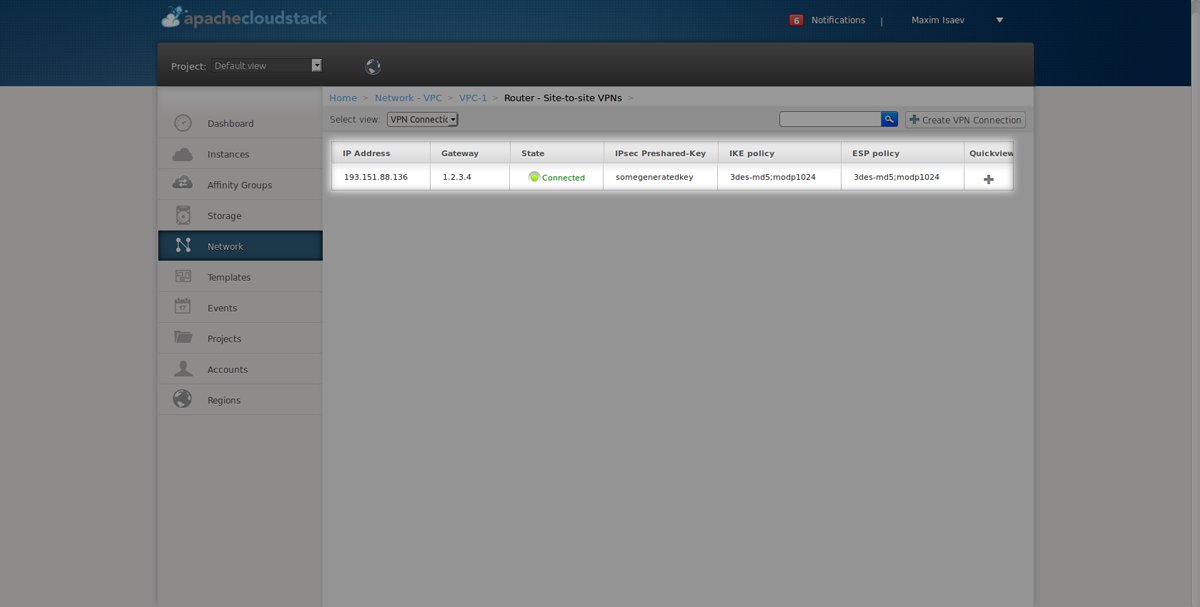
«Connected» must be on both the cloud side and the router side.
If you have any additional questions or something is not working, please contact our support team. We help our clients round-the-clock. You will quickly get answers and help in solving your tasks.